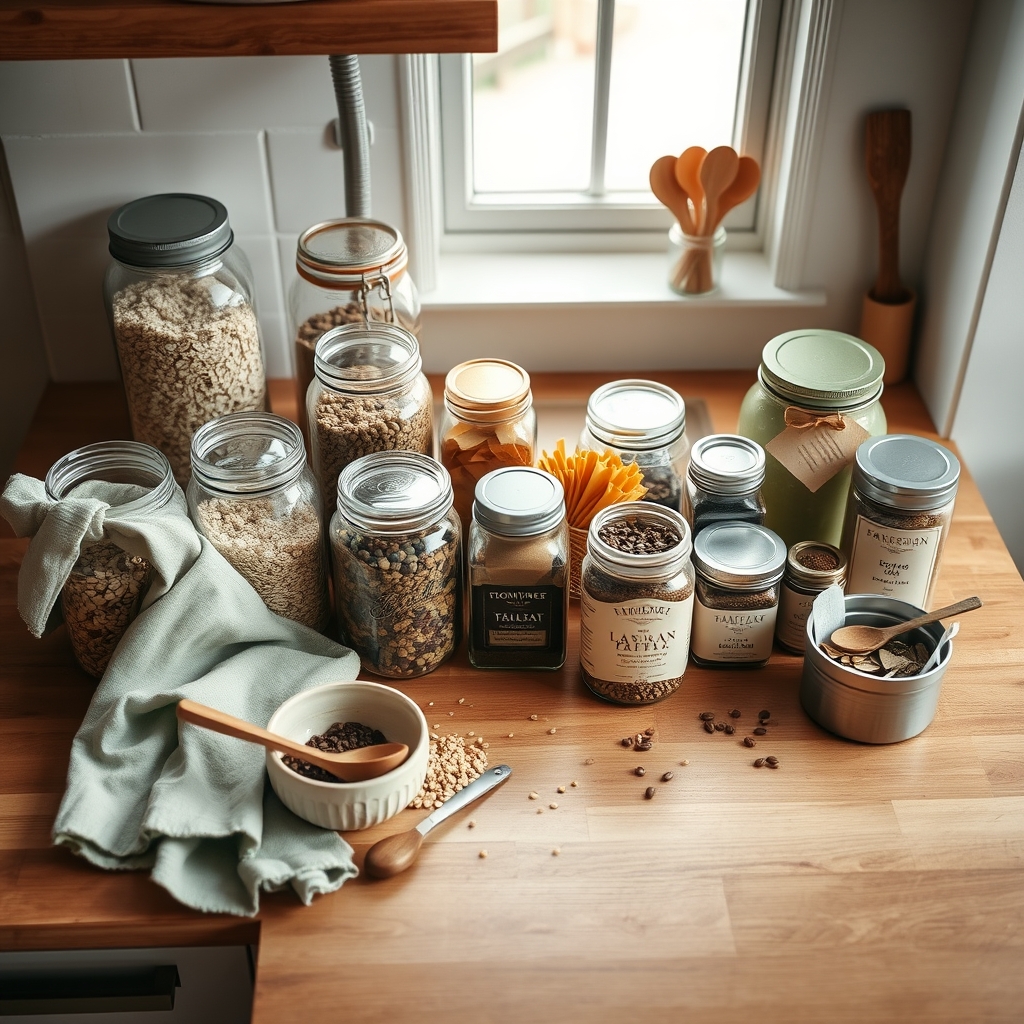
Most small-kitchen storage problems don’t get solved in a store aisle. They get solved by opening the cabinet you’ve been avoiding and finding out what’s already in there. The average kitchen holds a surprising number of usable containers: deli tubs, takeout boxes, yogurt pots, sauce jars, empty spice shakers, tins, and the odd plastic tray from a cookie package.
This guide shows you how to audit those containers, sort them into working zones, check which ones are actually safe to reuse, and build a system that survives a busy week. No matching glass jars with wooden lids required.
Start with what’s on your shelves, not a shopping cart
The biggest mistake in kitchen organizing is buying containers before you know what you own. As organizing sites point out, shopping first tends to produce mismatched sizes and empty containers that never find a job.
Wirecutter’s small-kitchen guidance takes the same view from the other direction: use the containers already in your kitchen. Nest measuring cups and spoons inside mixing bowls. Group things that already share a shape. Favor items that do two jobs over items that do one. (Wirecutter)
The three-pile countertop audit
Clear one countertop section and pull out every container, lid, jar, tin, and plastic tub in the kitchen. This includes the ones on the top shelf and the ones behind the mixer. Sort into three piles, the same keep/donate/toss triage that general decluttering checklists use (Todoist):
- Keep: containers with a matching lid, no cracks, and a size you’d actually fill.
- Relocate: good containers that belong somewhere other than the kitchen — bathroom cotton swabs, desk paper clips, garage screws.
- Let go: lidless containers, stained or warped plastic, and anything you’ve kept “just in case” for more than a year.
Match every lid to a base before you finish. A lid pile with no partners is usually the single biggest source of drawer clutter.
Count before you commit
Write down a rough tally: how many small containers, medium containers, tall jars, and wide jars you kept. This number decides your system. If you have nine tall jars and one shelf that fits them, that’s your pantry zone. If you have fifteen mismatched small tubs, they’re going to the drawer, not the open shelf.
Zone the kitchen by category, then match containers to zones
Once you know what you have, give each cabinet a job. The Kitchn’s upcycled-jar pantry project divided four everyday cabinets into four clear categories: herbs and spices; oils and condiments; nuts, grains and legumes; and canned goods and specialty items. Then it picked a right-sized jar for each item. (The Kitchn)
Keeping like items together does something beyond tidiness — it tells everyone in the house where things belong. That’s the point Just a Girl and Her Blog makes about the “like items together” rule: the system communicates itself.
Everyday-reach versus occasional-reach
Split every cabinet into two bands:
- Everyday-reach: between hip and eye level, at the front. Daily coffee, cooking oil, salt, the containers you open four times a week.
- Occasional-reach: top shelves, deep corners, the back row. Bulk backups, holiday baking supplies, the giant bag of rice you refill from.
Containers that get opened daily deserve the best spot in the kitchen. Containers that get opened twice a year shouldn’t take it.
One category, one container type
You do not need matching jars. You need consistency within a zone. If your spice shelf is all small jars with shaker tops, it reads as intentional even when the jars came from six different products. Mixed shapes in the same zone are what make a shelf look chaotic.
Know which containers are actually safe to reuse
Not every plastic tub is built to be refilled. The resin code inside the recycling triangle on the bottom is your fastest screen.
| Resin code | Common source | Reuse guidance |
|---|---|---|
| #1 PET | Water and soda bottles, some takeout lids | Generally not recommended for reuse with food |
| #2 HDPE | Milk jugs, some yogurt and deli tubs | Considered among the safer food plastics |
| #3 PVC | Some cling films and bottles | Best minimized around food |
| #4 LDPE | Flexible lids, squeeze bottles, bags | Considered among the safer food plastics |
| #5 PP | Most takeout containers, yogurt cups | Heat-tolerant and approved for food contact |
| #6 PS | Foam clamshells, some disposable cups | Best minimized around food |
| #7 Other | Mixed or polycarbonate plastics, some bioplastics | Avoid non-PLA #7 for food storage |
The summary above follows Healthline’s breakdown of plastic resin codes and a peer-reviewed editorial on plastic food container safety, which identify resins #2, #4, and #5 as the safest options. Acme Plastics notes that #5 polypropylene is FDA-approved for food contact and handles heat well.
Read the resin code on the bottom
Flip the container over. The number inside the triangle is the screen. If there’s no code at all, treat the container as single-use and move it out of food rotation.
Retire warped, scratched, or odorous plastic
Use your hands and nose, not just the number. Scratches create places where bacteria can settle, and single-use PET isn’t designed for refilling. ePackageSupply also advises against extreme heat, which means no reusing thin plastic tubs for hot soup or microwave reheating. Let go of anything warped, deeply scratched, stained, or holding onto a smell after washing.
Glass as the default for anything hot or fatty
For hot food, oily dressings, and leftovers you’ll reheat, glass is the simpler choice. Healthline recommends swapping plastic for glass where possible to reduce chemical exposure. And a caution worth repeating: “BPA-free” doesn’t automatically mean risk-free, since replacement chemicals aren’t necessarily better studied.
Give glass jars a second job — with the right lid and the right shelf
Sauce, pickle, and jam jars are free pantry storage, and they’re especially good for bulk dry goods that arrive in floppy, hard-to-reseal bags. Use a marker to note the contents and the best-before date on each one.
Lids matter more than the jar
A reused jar is only as sealed as its lid. Original lids are often designed for one seal, so don’t assume a jar is airtight after you refill it — call it “as sealed as the lid allows.” If you’re storing something that goes stale fast, a jar with a tired lid isn’t the right home. Canning jars are a different story: they’re tempered and handle temperature swings better than one-time glass. (Fillmore Container)
What not to freeze in glass
Freezing in glass works if you follow three rules: use wide-mouth, straight-sided jars; cool the food to fridge temperature before it goes in the freezer; and leave headspace for expansion. Narrow-necked or curved jars are more likely to crack. (Fillmore Container)
Where jars beat plastic boxes
On open shelving and in drawers, where you can see the contents at a glance. Visibility prevents duplicate purchases — the second bag of cumin you buy because you couldn’t see the first. Clear containers are a recurring recommendation in decluttering guides for exactly this reason (Todoist).
Build dividers and drawer sections from packaging you’d otherwise bin
Before you buy a drawer organizer, look in your recycling bin. Upcycle My Stuff documents no-cost drawer dividers made from cardboard packaging, and tin cans cleaned, dried, and wrapped in decorative paper for utensil storage.
Cardboard dividers measured to the drawer
Cut corrugated cardboard to the depth of your drawer to make simple dividers. Wrap them in leftover paper, contact paper, or even a paper bag so they wipe clean. Cardboard alone absorbs spills and grease, so sealing the surface is worth the ten minutes.
Tins for utensils, not for food
A cleaned tin can is a good utensil holder. It is not a good food container. The cut edge can rust, the seams are hard to clean, and the interior lining isn’t meant for repeated food contact. Keep the boundary clear: tins hold tools, jars and plastic tubs hold food.
Cookie trays and box inserts as instant trays
Keep the molded plastic tray that came inside a cookie or chocolate box. It will hold spice jars, small packets, or batteries in a drawer. The same goes for shallow cardboard or plastic trays from packaging — they’re already sized and shaped to keep things from rolling.
Label with what you have in the drawer
You don’t need a label maker. Bon Appétit’s recommendation is masking tape plus a marker for labeling containers with contents and cook date, partly because tape peels off without leaving sticky residue. (Bon Appétit) Paper and chalkboard labels are the other option, but they can peel or smudge over time (Savvy & Sorted).
Contents plus date, in one line
That’s the minimum. Write “chili — 12 Mar” or “oats — opened 4 Feb” and you’ve solved most of the guesswork. For jars of dry goods, add the best-before date from the original bag.
What the printed date does and doesn’t mean
Here’s the useful part: with the exception of infant formula, printed date labels are mostly about quality, not safety. StopWaste notes that confusion over date labels is estimated to account for roughly 20 percent of consumer food waste. Your handwritten date tells you when you actually opened the container, which is more useful than a printed date on a box you decanted from.
Use real shelf-life figures to decide what gets decanted
Fully decanted pantries look great online. They also involve work that you may not want to repeat every month. The practical rule: decant what you use often; leave the occasional box in its original packaging.
Ohio State University Extension publishes recommended storage times at 70°F for pantry staples. Some useful benchmarks from the OhioLine fact sheet:
| Item | Recommended storage time |
|---|---|
| Baking powder | 18 months |
| Baking soda | 2 years |
| Dried bread crumbs | 6 months |
| Bouillon cubes or granules | 1–2 years |
| Unopened canned foods | 12 months |
Decant the frequent, leave the occasional boxed
Green Mountain Space makes a sensible counterpoint to the aesthetic version of pantry organizing: decant what you use often, and skip the jars that feel like extra work. A box of rye flour you use twice a year doesn’t need to be transferred, labeled, and washed.
Keep the original packaging info
Cut the cooking instructions or allergen details off the box and tape them to the back of the jar. That way you’re not searching for the other half of the box in the recycling at dinner time.
Rotate the front row
First in, first out. When you refill a jar, put the new contents behind the old. It’s the same principle as a restaurant walk-in, and it costs nothing.
Squeeze more storage from the same square footage
Once your containers have homes, look for surfaces you’re not using. Wirecutter points to magnetic shelves and risers as useful in tight spaces, and notes that lids are hard to stack — which is why a dedicated lid rack or bin helps. (Wirecutter)
Vertical before horizontal
A shelf riser turns one shelf into two sightlines: taller items behind, shorter containers in front. You don’t have to buy one — a sturdy box, a shallow drawer, or a stack of cookie tins can raise a row of small jars. The Container Store’s kitchen section recommends risers and door racks for exactly this reason. Start with the riser you can improvise before considering a purchase.
The fridge side and cabinet doors
The vertical face of your fridge is storage you already own. So is the inside of a cabinet door. The Kitchn lists magnets on the fridge side, hooks under cabinet undersides, and the back of cabinet doors among the most underused surfaces in small kitchens. (The Kitchn)
A lid zone
Lids don’t stack well, so give them one home: a bin, a magazine file, a shallow box, or a rack on the cabinet door. One lid zone ends the daily hunt.
A maintenance rhythm that survives a busy week
Any system can look good on a Sunday. The test is whether it still works on a Thursday.
The five-minute reset
Once or twice a week, walk the kitchen with a single task: put strays back in their zones. Don’t reorganize, don’t re-audit, don’t start a new system. Just return things. This is the maintenance version of the keep/donate/toss sort you did at the beginning, which is designed to be repeated rather than treated as a one-time event (Just a Girl and Her Blog).
Quarterly re-zone
Every few months, do a light seasonal pass. Items drift — the coffee moves across the counter, a new utensil takes the front of a drawer. Spend fifteen minutes checking whether each zone still matches what you actually reach for. This is a tune-up, not a full overhaul.
Signs the system needs adjusting
- A container has stayed empty for a month. It’s in the wrong zone, or it doesn’t need to exist.
- A cabinet never gets opened. The items in it should probably move closer.
- You’ve bought a duplicate of something you already owned. Visibility is the problem.
- Lids are loose in the drawer again. Rebuild the lid zone.
Frequently Asked Questions
Are takeout containers safe to reuse?
It depends on the resin code. Most takeout containers are #5 polypropylene, which is considered one of the safer food plastics and handles heat well. Check the bottom of the container before you refill it.
Can I reuse glass sauce jars for food storage?
Yes, as long as the jar is clean and undamaged. Keep in mind that the original lid may not seal as tightly the second time, so don’t assume the jar is airtight.
Do I need matching containers to have an organized kitchen?
No. Consistency within a zone matters more than matching across the kitchen. A shelf of similar-sized jars reads as organized even when the jars came from different products.
Should I decant everything into jars?
Only what you use often. Staples you use weekly are worth decanting; items you use a few times a year can stay in their original packaging. Keep cooking instructions and allergen details if you do decant.
How often should I check my reused containers?
At each quarterly re-zone. Retire anything warped, deeply scratched, stained, or holding onto a smell after washing.
What’s the quickest way to label a container?
Masking tape and a marker. Write the contents and the date on one line, and peel it off when you refill.
What’s the biggest mistake in small-kitchen container organizing?
Buying containers before auditing what you have. It usually leads to mismatched sizes and containers with nothing to hold (Savvy & Sorted).
Comments